안녕하세요. 미룬이 메리입니다.
왜 미룬이고 물으신다면, 지금 이 포스팅을 쓰기 싫어 미뤘기 때문이죠. (하하)
오늘은 두가지에 대한 포스팅을 추가적으로 써보려고 합니다.
1. Typescript 지원
2. Github Actions를 사용한 배포 자동화

1. Typescript 지원
가깝지만 먼 사이, 타입스크립트를 예제 라이브러리에 적용시켜 봅시다. 기존 예제는 이전 포스팅을 참고해주세요.
1-1. 타입스크립트 설치
// ts를 js로 변경하는 컴파일러 제공
npm install typescript
1-2. ts-node 설치
// ts파일을 js로 컴파일해서 node 실행 제공
npm install -D ts-node
1-3. tsconfing.json 생성
npx tsx --init
설치가 완료되면 tsconfing.json 파일을 수정해 줍니다.
{
  "compilerOptions": {
    "target": "es6",
    "module": "commonjs",
    "lib": ["es5", "es6", "dom"],
    "declaration": true,
    "outDir": "./dist",
    "strict": true
  }
}
declaration : 자동으로 타입정의 파일(d.ts)을 생성하는지 유무(T/F)
outDir : 컴파일된 결과물을 어디에 저장하는지를 명시해 줌(예제는 dist 폴더에 저장)
그리고 기존에 생성한 index.js를 index.ts로 변경해 주고 예제 함수를 변경해 줍니다.
function Hello(text: string) {
  return text;
}

export { Hello };
그리고 tsconfig.json에서 컴파일할 대상을 명시해 줍니다.
{
  "compilerOptions": {
    "target": "es6",
    "module": "commonjs",
    "lib": ["es5", "es6", "dom"],
    "declaration": true,
    "outDir": "./dist",
    "strict": true
  },
  "include": ["index.ts"] //컴파일 할 대상 명시
}
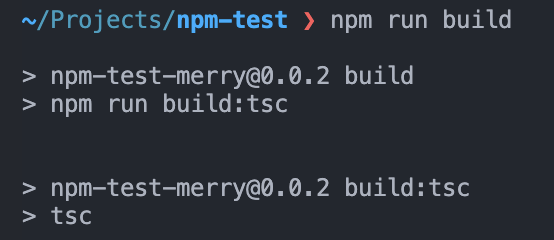
package.json에서 build script를 작성해 준 후 터미널에서 'npm run build'를 실행해 줍니다.
 "scripts": {
    "build": "npm run build:tsc",
    "build:tsc": "tsc"
  },
빌드가 되면 dist 폴더가 생성되고 폴더 안에 index.d.ts와 index.js 파일을 확인하실 수 있습니다.
// index.d.ts
declare function Hello(text: string): string;
export { Hello };
그리고 컴파일된 결과물에 맞춰 package.json을 수정해 줍니다.
{
  "name": "npm-test-merry",
  "version": "0.0.2",
  "type": "module",
  // 기본 진입점 수정
  "main": "dist/index.js",
  "license": "MIT",
  "scripts": {
    "build": "npm run build:tsc",
    "build:tsc": "tsc"
  },
  // types 필드 추가로 명시
  "exports": {
    ".": {
      "types": "./dist/index.d.ts",
      "import": "./dist/index.js",
      "require": "./index.cjs",
      "default": "./index.js"
    }
  },
  "dependencies": {
    "npm-test-merry": "^0.0.2",
    "typescript": "^5.6.2"
  },
  "devDependencies": {
    "ts-node": "^10.9.2"
  }
}
마지막으로 버전을 올린 후, 배포를 해봅니다.
typescript라는 기능을 추가했기 때문에 minor 버전을 올려줍니다.
정상적으로 배포가 된 후 라이브러리를 임포트 하면 타입 지원을 확인해 볼 수 있습니다.
npm version minor

npm publish
2. Github Actions를 사용한 배포 자동화
깃허브에 코드를 배포가 되어 있다는 가정하에 포스팅을 작성하겠습니다.
2-1. npm Access Token 발급
Github Actions의 workflow를 만들기 전, npm 계정 Access Tokens에서 토큰을 발급합니다.
Generate New Token에서 Classic Token을 선택하면,
아래 사진처럼 Access Token을 만드는 화면이 나오는데 1) 토큰 이름을 입력해 주고, 2) publish 타입을 설정해 주면 토큰이 생성됩니다.
그리고 발급된 토큰을 꼭 기억해 주세요.


2-2. Github Repository에 npm 토큰 등록
Github 레포지토리에 들어간 다음 아래 사진과 같이
Settings > Secrets and variables에서 Repository secret을 등록해 준다.
저는 `NPM_AUTH_TOKEN`이라는 이름으로 만들어 두었습니다.

2-3. Github Actions Workflow 생성
토큰 발급, 시크릿 키 등록이 모두 완료되었다면 workflow를 생성합니다. 생성 후 아래 코드를 넣어줍니다.

name: ios-react-time-picker publish

on:
  push:
    branches:
      - main

jobs:
  release:
    permissions:
      # 저장소의 컨텐츠에 대한 읽기 권한 부여
      contents: write
      # 풀 리퀘스트에 관련된 작업에 쓰기 권한 부여
      pull-requests: write
    runs-on: ubuntu-latest
    steps:
      - name: Checkout code
        uses: actions/checkout@v4

      # 마지막 커밋 메세지 가져온 후 get_commit_message 변수에 저장
      - name: Get commit message
        id: get_commit_message
        run: echo "::set-output name=message::$(git log -1 --pretty=%B)"

      # 커밋 메세지에서 버전 추출 후 extract_version 변수에 저장
      - name: Get version from commit message
        id: extract_version
        run: |
          version=$(echo "${{ steps.get_commit_message.outputs.message }}" | sed -n 's/.*\(v[0-9]\{1,\}\.[0-9]\{1,\}\.[0-9]\{1,\}\).*/\1/p')
          echo "::set-output name=version::$version"

      # 버전 정보가 포함되어 있는지 확인
      - name: Check version
        run: |
          if [ -z "${{ steps.extract_version.outputs.version }}" ]; then
            echo "Version not found in commit message"
            exit 0
          fi

      # npm 배포를 위한 Node 설치
      - uses: actions/setup-node@v3.6.0
        with:
          node-version: "20.3.0"

      # 인증토큰 .npmrc 파일에 설정
      - name: Setup npm auth
        run: echo "//registry.npmjs.org/:_authToken=${NPM_AUTH_TOKEN}" > ~/.npmrc
        env:
          NPM_AUTH_TOKEN: ${{ secrets.NPM_AUTH_TOKEN }}

      # 깃허브 봇으로 package.json 파일 version 을 git tag 버전으로 업데이트
      - name: Update package version
        if: steps.extract_version.outputs.version != ''
        run: |
          git config --global user.email "github-actions[bot]@users.noreply.github.com"
          git config --global user.name "github-actions[bot]"
          git tag -d ${{ steps.extract_version.outputs.version }} || true
          git push origin :refs/tags/${{ steps.extract_version.outputs.version }} || true
          npm version ${{ steps.extract_version.outputs.version }}

      # 업데이트 버전 commit / push
      - name: Commit updated package version
        if: steps.extract_version.outputs.version != ''
        uses: stefanzweifel/git-auto-commit-action@v4
        with:
          commit_message: "[chore] update package version"
          branch: main

      # git tab 신규 생성
      - name: Update git tag
        if: steps.extract_version.outputs.version != ''
        run: |
          git tag -f ${{ steps.extract_version.outputs.version }}
          git push --force origin ${{ steps.extract_version.outputs.version }}

      # npm의 access token을 사용해 배포
      - run: npm publish
        if: steps.extract_version.outputs.version != ''
        env:
          NPM_AUTH_TOKEN: ${{ secrets.NPM_AUTH_TOKEN }}
제가 작성한 코드는 아래와 같습니다. ❗❗
- main 브랜치에 push가 될 경우, 최근 커밋 메세지(get_commit_message)를 확인합니다.
- 커밋 메세지 안에 v0.0.0 형식이 존재할때 -> npm publish
- 커밋 메세지 안에 형식이 존재하지 않을 때 -> if 조건문으로 해당 step 건너 뜀
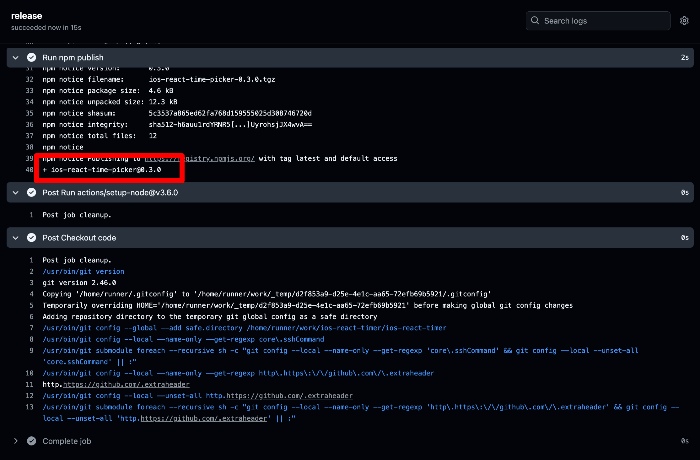
그래서 제가 아래 사진과 같이 '[publish] update version v0.3.0'의 형식으로 커밋메세지를 작성 후 push 하면
커밋메세지에 작성한 버전으로 배포되는 것을 확인할 수 있습니다.


ERROR ❗❗ 이전 버전으로 배포 시 아래와 같은 오류가 나니 주의해 주세요!

만약, 버전 정보를 포함하고 있지 않다면 아래 사진과 같이 해당 step을 건너뛰는 걸 확인할 수 있습니다.


이상으로 타입스크립트 설정부터 Github Actions을 사용한 배포 자동화까지 간단하게 살펴보았습니다.
여러 블로그 + gpt의 도움을 받아서 작성한 workflow라 정확하진 않을 수 있습니다. 참고만 해주세요!
제가 만든 라이브러리라니, 뭔가 재밌는 경험이었습니다.
Github Actions은 알면 알수록 대단하고 어려운 것 같습니다. 항상 배포할 때마다 없던 신앙심이 생기는 기분이랄까요...
제가 만든 라이브러리는 아래에서 확인할 수 있습니다.
많관부.
ios-react-time-picker
ios style time picker for React app.. Latest version: 0.3.0, last published: 13 minutes ago. Start using ios-react-time-picker in your project by running `npm i ios-react-time-picker`. There are no other projects in the npm registry using ios-react-time-pi
www.npmjs.com
'프론트엔드' 카테고리의 다른 글
| npm 라이브러리를 만들어보자! (1) | 2024.09.11 |
|---|---|
| AWS + Next.js + Nginx 대환장 파티 경험하기(2) (0) | 2024.07.31 |
| AWS + Next.js + Nginx 대환장 파티 경험하기 (1) | 2024.07.25 |
| Next.js + Mobx 로 Toast alert 만들어보기 (1) | 2024.05.29 |
| Next.js 모니터링 하기(feat. Sentry.io) (0) | 2024.05.24 |


